The Comprehensive Guide to Erecting Ringlock Scaffolding
Jul 15, 2023Welcome to our comprehensive guide on erecting ringlock scaffolding. In this article, we will provide you with a step-by-step process to help you successfully set up ringlock scaffolding for your construction projects. Ringlock scaffolding is a versatile and popular choice due to its durability, flexibility, and ease of assembly. By following our detailed instructions, you will be able to efficiently erect ringlock scaffolding while ensuring safety and stability.
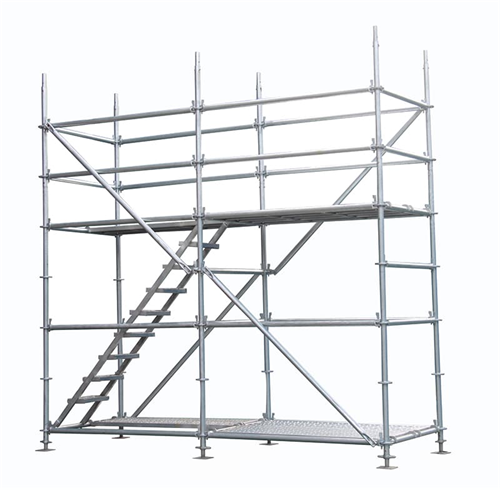
Before we delve into the assembly process, let's discuss the essential components and tools you'll need for erecting ringlock scaffolding:
Vertical Standards: These are the main vertical components that form the framework of the scaffold.
Ledgers: Horizontal components that connect the vertical standards, providing structural stability.
Diagonals: Diagonal braces that increase the rigidity of the scaffold structure.
Base Jacks: Adjustable components are used to level the scaffolding on uneven surfaces.
Steel Planks: Platforms where workers can stand and perform tasks.
Toe Boards: Placed along the edges of the scaffold to prevent tools or materials from falling.

Now that we have the necessary components and tools, let's move on to the step-by-step process of erecting ring-lock scaffolding.


1. Prioritize safety by providing workers with appropriate personal protective equipment (PPE) such as hard hats, safety harnesses, gloves, and non-slip footwear.
2. Clearly mark the scaffolding area with warning signs to prevent unauthorized access.
3. Regularly inspect the scaffolding for any signs of damage or instability and address them immediately.
4. Train workers on proper scaffold usage, including safe climbing techniques and weight limitations.

You can refer to our product construction video:
By following this comprehensive guide, you are now equipped with the knowledge to erect ringlock scaffolding for your construction projects effectively. Remember to prioritize safety throughout the assembly process and conduct regular inspections to maintain the stability and integrity of the scaffolding.
In addition to providing you with professional interlocking scaffolding tutorial files and videos, AJ Scaffolding also has professional technicians to provide you with professional guidance services. In addition to interlocking scaffolding, we also provide other building materials, such as scaffolding accessories, formwork and its accessories, etc., to provide you with a one-stop building materials procurement service.
If you have any questions about the construction of interlocking scaffolding, or want to purchase other building materials, please contact us!

What Is The Difference Between Ring Lock And Cuplock Scaffolding?
What Size Is Ringlock Scaffolding?
What Is The Safety Distance For Scaffolding?
What Is Ringlock Technology In Scaffolding? --- QUORA
Experimental Studies Of Ringlock Scaffolding Joint --- RESEARCHGATE
Scaffolding Families -Best Method To Use? --- FORUMS
Email : aj-steven@dghualifeng.com.cn


Friendly Links :
Kitchen Cabinet© 2026 Guangzhou AJ Building Material Co.,Ltd All Rights Reserved


 en
en fr
fr es
es