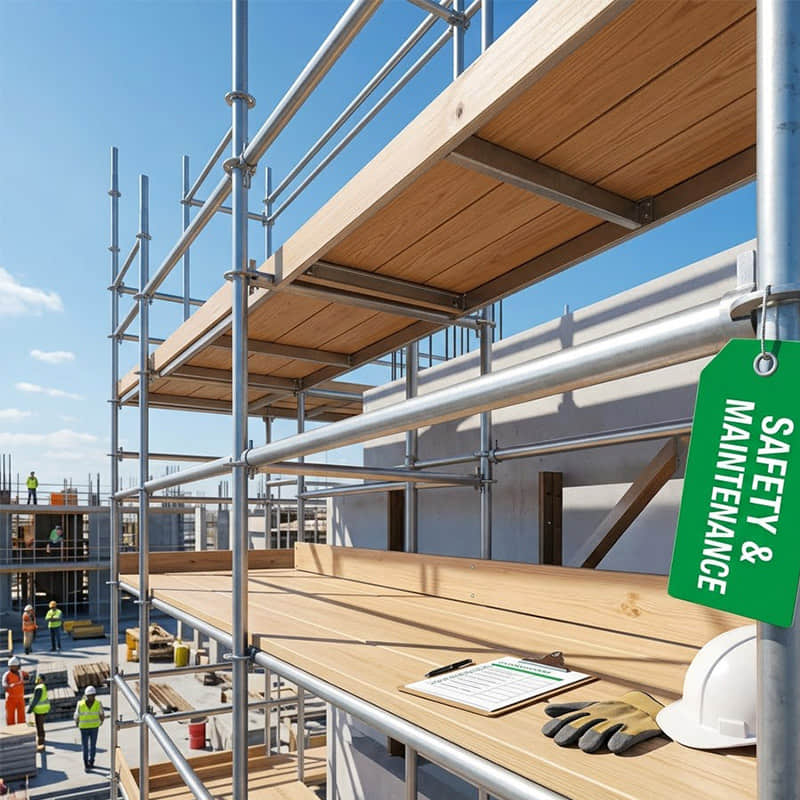
The Ultimate Guide to Scaffolding Maintenance: Ensuring Safety and Longevity
May 11, 2026
The scaffolding industry is the most significant part of the current construction and renovation industries. The scaffolding design provides the essential means of vertical and horizontal access as well as the structural support necessary to safely and efficiently bring design ideas to life; however, due to the exposure of scaffolding to severe environmental factors, heavy dynamic load conditions, and the normal assembly and disassembly processes, scaffolding products (including components, tools, accessories, etc.) are susceptible to deterioration or damage at a high rate.
The neglect of scaffolding maintenance is considered an operational failure as well as a major safety concern and a considerable cost to the contractor. Scaffolding that has been compromised can cause catastrophic accidents on site, result in significant delays in the completion of the project, and incur substantial expenses to replace the failed scaffold equipment.
In this article, we will describe best practices to be utilized for scaffolding maintenance, including the establishment of inspection routines and proper procedures for the cleaning, storing, and maintaining of scaffolding equipment. By implementing the procedures found in this guide, you will be able to safeguard your workers and protect your investment in scaffolding equipment.
Why Regular Scaffolding Maintenance is Non-Negotiable
Understanding the core reasons behind meticulous scaffold care is the first step in building a proactive maintenance culture within your operations.
1. Making Worker Safety an Absolute Priority:
Scaffolding’s primary purpose is to provide a safe work area high up on the building. Any structure can fail due to issues with rusted parts, cracked welding, and rotted wood, leading to someone falling or being severely injured if they do fall. Through consistent maintenance, the performance of all the parts will be exactly as designed, thereby minimizing risk and protecting the lives of all workers who rely on a scaffold.
2. Maximizing ROI and Equipment Lifespan
Scaffolding systems involve a large capital outlay. They are assets of an organisation, and without proper maintenance, will depreciate. Equipment that is well maintained over the life cycle of the scaffolding will typically last for many years, whereas equipment that has been poorly maintained may likely be useless after only a few projects. Regular preventative maintenance, such as removing rust regularly and lubricating moving parts, increases the life cycle of an organisation's inventory and therefore increases the Return on Investment (ROI) of the investment significantly.
3. Ensuring Regulatory Compliance and Avoiding Liability
To stay compliant with safety regulations and prevent liability, you have to comply with the International Standard for Occupational Health and Safety (ISO 45001). Violations of these regulations can result in personal liability in multiple ways, ranging from significant fines to business interruption to serious criminal liability if someone is injured as a result of a violation. The best protection against such violations will come from a history of documented maintenance.
The Core Components of a Scaffolding Maintenance Strategy
Effective scaffolding maintenance is not a one-time event; it is a continuous, systematic process. To keep your inventory in peak condition, you must implement the following four operational pillars.
Pillar 1: Rigorous Pre-Use and Post-Use Inspections
Visual and physical inspections are the frontline defense against scaffolding failure. Inspections should not be treated as a formality, but as a critical operational step conducted by a competent and trained individual.
Inspect for Structural Deformations: Examine scaffolding tubes, ledgers, and transoms to ensure their straightness. The structural integrity of the scaffolding is compromised by bent or twisted scaffolding steel and should be taken out of production as soon as possible.
Inspect the For Welding Connections: The states and welds of a steel or aluminium scaffold are the areas you want to look for the most failures. Therefore, you will want to check the line of connection, as you may find some fine cracks and flaking of paint surrounding the connection, which may indicate stress on the structure.
Assess Locking Mechanisms: Ensure that all couplers, clamps, pins, and locking mechanisms operate smoothly. Threads should not be stripped, and moving parts must easily lock into place without requiring excessive blunt force.
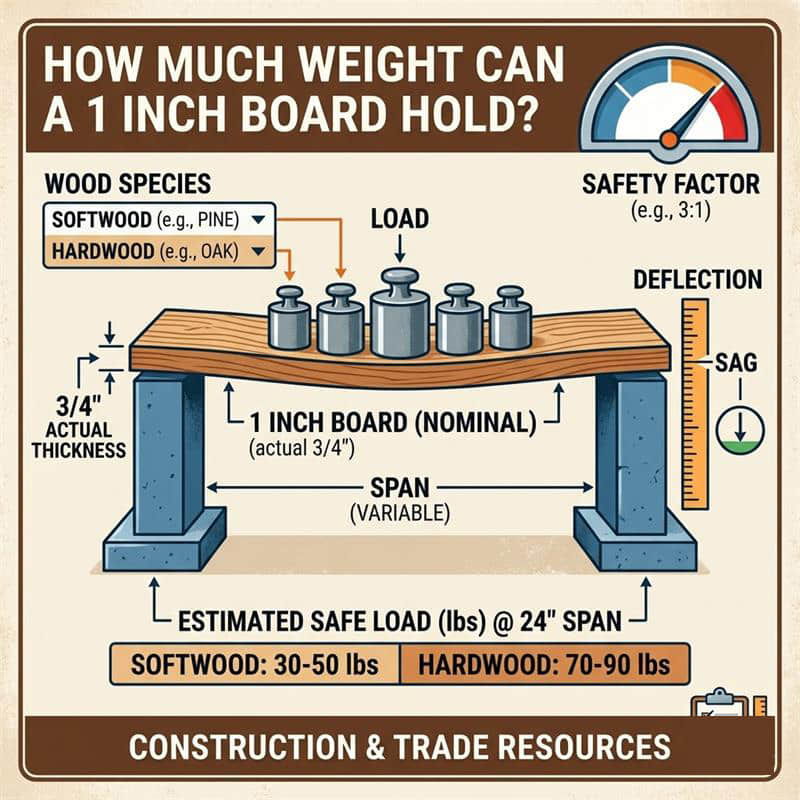
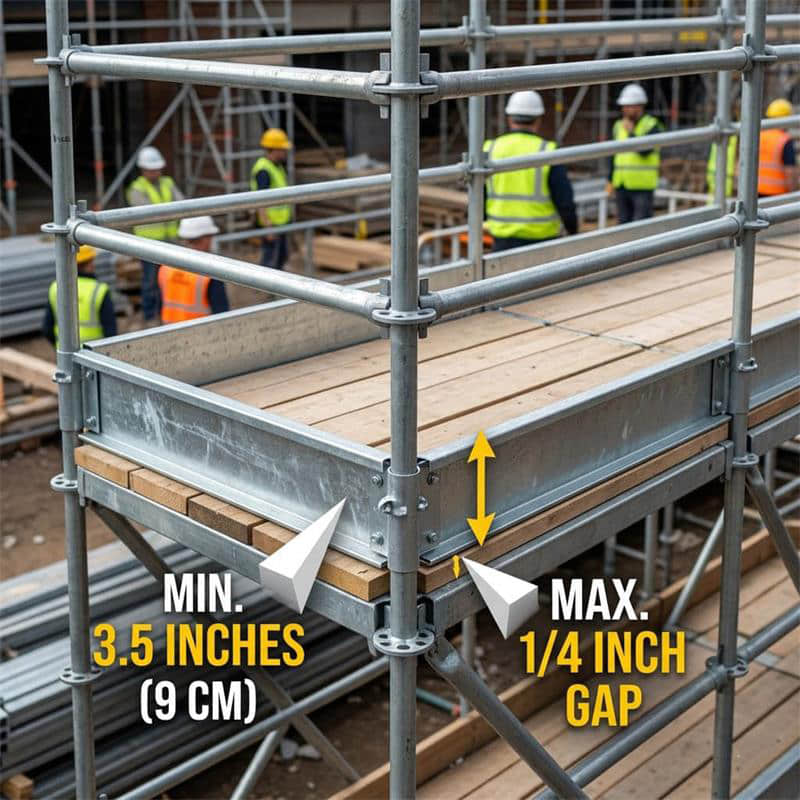
Evaluate Planks and Platforms: Inspect wooden boards for signs of dry rot, deep structural splits, or excessive warping. For metal decks, check for denting that could cause tripping hazards and ensure the anti-slip surfaces are still intact.
Pillar 2: Proper Cleaning Protocols
Scaffolding endures constant exposure to concrete, mortar, paint, dirt, and chemical solvents. Allowing these substances to harden or linger on the equipment accelerates degradation.
Debris Removal: Wet concrete, mortar, and plaster should be taken off scaffolding tubes and clamps as soon as they are removed; if you wait until the concrete is cured, you will have to use a great deal of force (for example, by pounding on them) to remove it. Using force to remove the debris may cause damage to the material, which could dent the surface or alter the structural soundness of the material.
Corrosion Prevention: Scaffolding parts will corrode if they have dust and/or wetness on them. Use the proper type of industrial cleaner on scaffolding parts to remove these contaminants, as well as to remove the rust-causing agents. After you have cleaned the parts thoroughly, they must be completely dry before they can be stored.
Lubrication: All couplers, screw jacks, and hinges should be wiped clean and periodically lubricated with a high-quality, dry film lubricant that resists moisture, but does not attract too much dust and grit that would interfere with the smooth operation of the threads.
Pillar 3: Safe Transportation and Handling
Much of the damage sustained by scaffolding occurs not when it is standing, but when it is being moved from one site to another.
Steering Clear of Component Damage: All employees involved in dismantling scaffolds must refrain from throwing or dropping materials from above, as each impact causes micro-fractures in metal components and will also split wooden boards. When dismantling, use ropes, hoists, or human chains to safely lower materials.
Proper Transport: When transporting materials by flatbed truck, be sure to have all components strapped down and secure. If tubes roll and strike each other during transport, they will become severely dented and scratched, thereby removing the protective galvanized layer, which allows rust to form.
Pillar 4: Strategic Storage Solutions
How you store your scaffolding between projects heavily dictates its lifespan. Leaving equipment exposed to the elements in a muddy yard is a fast track to rust and rot.
Elevate Off the Ground: Under no circumstances should scaffolding be stored directly on soil or grass. The moisture from the ground will damage (rot or corrode) either wood or metal, only if stored this way. You must store scaffolding off the ground with the use of timber dunnage, pallets, or specially-designed racks to keep the equipment well-aerated and off the ground.
Provide Adequate Cover: When possible, store your scaffolding inside or beneath an appropriate waterproof cover. If you must store your scaffolding outside, cover it with heavy-duty, breathable tarps in order to protect it from rain and snow, as well as to lessen the likelihood of condensation forming on the equipment.
Stacking Materials in an Organized Manner: Stack the materials in an organized manner. Keep the heavier steel tubes at the bottom and add the lighter-weight aluminum or wooden components on top. Arrange the components by size and type, which will help prevent damage caused by stacking incorrectly, and will also help reduce the amount of time it takes to load materials for the next project.
Material-Specific Maintenance Tips
Different materials require slightly different approaches to care and maintenance.
Steel Scaffolding
While highly durable, steel's greatest enemy is corrosion.
Regularly check the galvanized coating or paint. If you spot localized rust, sand it down immediately and apply a zinc-rich, rust-inhibiting primer to seal the metal from airborne moisture.
Ensure internal tubes are not harboring standing water, which can cause rusting from the inside out.
Aluminum Scaffolding
Aluminum is lightweight and naturally resists rust through oxidation, making it excellent for mobile towers.
However, aluminum is softer than steel and more prone to denting. Pay extra attention to impact damage.
Check for white, powdery oxidation spots; while not structural rust, excessive buildup can interfere with the smooth fitting of connecting components.
Wooden Planks (Scaffold Boards)
Wood requires diligent environmental control to maintain its load-bearing rating.
Protect ends with metal banding to prevent the wood from splitting.
Never paint wooden scaffolding planks. Paint hides underlying defects, knots, and rot from safety inspectors. If a board must be treated, use a clear wood preservative.
Establishing a Documentation and Tagging System
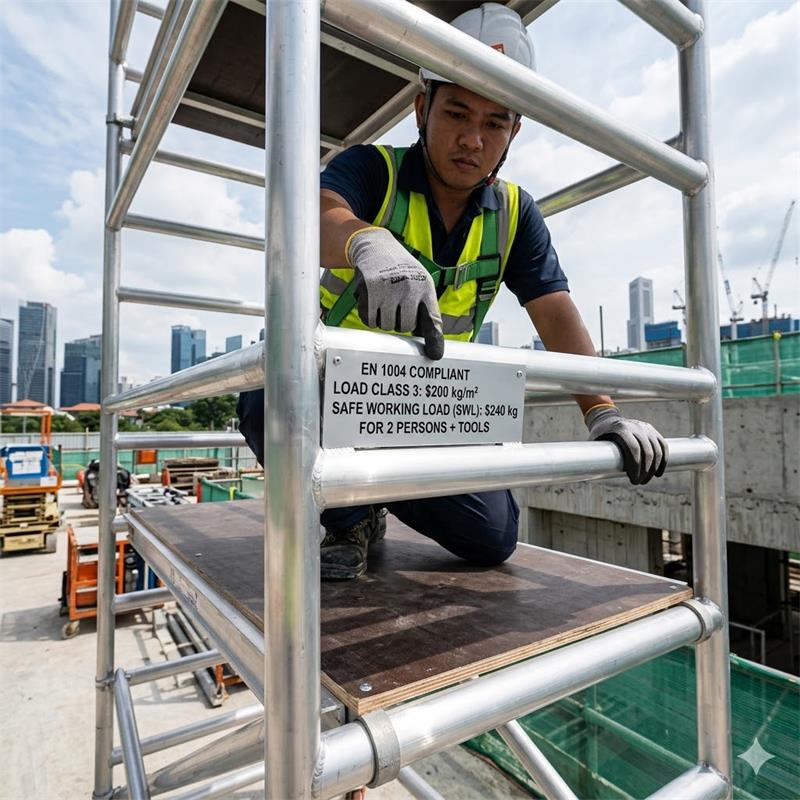
A maintenance strategy is only as good as the records kept. Implement a strict Scaffolding Tagging System to communicate the status of the equipment clearly to all personnel.
Green Tags: Indicates the scaffold has been inspected, maintained, and is 100% safe for use.
Yellow Tags: Indicates the scaffold is safe but has specific modifications or requirements (e.g., requires a fall arrest system).
Red Tags: Indicates the equipment is unsafe, damaged, or currently under maintenance. Do not use.
Pair this tagging system with a digital or physical maintenance log. Recording when equipment was purchased, when it was last inspected, and what repairs were made allows you to track the depreciation of your assets and make informed, data-driven purchasing decisions.
Conclusion
Proactive scaffolding maintenance is not merely an overhead cost; it is an investment in the safety of your team, the efficiency of your operations, and the longevity of your assets. By strictly adhering to regular inspections, thorough cleaning, careful handling, and strategic storage, you can virtually eliminate equipment-related downtime and hazards. Cultivating a culture that respects and maintains its tools ultimately builds a stronger, more reliable foundation for every project you undertake.
Is your scaffolding equipment meeting the highest standards of safety and durability? Whether you need advice on maintaining your current inventory or are looking to invest in premium, long-lasting scaffolding systems designed to withstand the toughest environments, we are here to help.
[Contact our experts today] to discuss your project requirements and elevate your construction standards!
FAQ
How often should scaffolding be inspected on a construction site?
Scaffolding must be inspected strictly before its first use, before each subsequent work shift, and after any event that could affect its structural integrity (such as severe weather, heavy winds, or accidental impact). Additionally, regulatory bodies typically require a documented, comprehensive inspection by a competent person at least once every 7 days.
Can bent or damaged steel scaffolding tubes be repaired and reused?
No. Attempting to straighten bent steel or aluminum scaffolding tubes is highly dangerous and strongly discouraged by safety authorities. Once a metal tube is deformed, its structural integrity and load-bearing capacity are permanently compromised. Damaged tubes, broken couplers, and deeply dented components must be immediately removed from service, marked with a red tag, and scrapped or recycled.


 en
en fr
fr es
es